Contents:
- How Do You Draw Realistic Flowers With Colored Pencils?
- Why Choose Colored Pencils for Botanical Drawing?
- Essential Supplies for Colored Pencil Florals
- Top Picks for Colored Pencils
- Paper Matters
- Other Must-Have Tools
- Step-By-Step Colored Pencil Botanical Drawing Tutorial
- Step 1: Choose and Observe Your Flower
- Step 2: Light Pencil Sketch
- Step 3: Select Your Palette
- Step 4: Block in the Lightest Colors
- Step 5: Layer and Blend
- Step 6: Deepen the Shadows
- Step 7: Finishing Touches
- Common Mistakes (and How To Fix Them)
- Overblending
- Outlines Too Dark
- Skipping Shadows
- Dirty Colors
- Real-World Examples: US Botanical Artists
- Modern Botanical Illustration Stars
- Where to Find Inspiration and Classes in 2026
- Frequently Asked Questions
- How do I make flower petals look soft and realistic with colored pencils?
- What are the best colored pencil brands for botanical art in the US?
- How do I choose paper for colored pencil flower drawings?
- Can I fix mistakes in colored pencil botanical sketches?
- Where can I share or sell my colored pencil flower art in the US?
- Ready to Try? Here’s Your Challenge
Colored Pencil Botanical Drawing Tutorial
A single petal can contain more color combinations than a box of Crayolas. Botanical drawing isn’t just about loving flowers–it’s about slowing down with them, observing every curve, hue, and highlight. There’s a reason botanical illustrators of the past were considered both scientists and artists. Today, colored pencil botanical drawing offers a rewarding way to connect creativity with the natural world–even if your last art class was back in high school.
How Do You Draw Realistic Flowers With Colored Pencils?
Start with observation–look for the flower’s unique shapes and subtle shifts in color. Lightly sketch your outline using a sharp pencil, then build up colors gradually, layering from light to dark. Use a blending pencil or soft tissue for seamless gradients. For lifelike texture, alternate between hard and soft pencils (like Prismacolor Premier and Faber-Castell Polychromos). Pay special attention to shadows and highlights–they give your drawing dimension.
Why Choose Colored Pencils for Botanical Drawing?
Colored pencils bring precision and versatility to botanical illustrations. Unlike watercolor or ink, which can be unforgiving, pencils let you control every blend and detail. If you want to emphasize the velvet texture of a rose petal or the subtle veining on a magnolia leaf, pencils are your friend.
Quick comparison:
| Medium | Pros | Cons |
|---|---|---|
| Colored Pencils | Affordable, portable, precise, easy to fix | Time-consuming, needs patience |
| Watercolor | Vibrant, fluid, fast coverage | Less control, harder to erase |
| Markers | Bold, bold, bold–quick impact! | Bleed-through, limited subtleties |
| Digital (iPad/PC) | Undo button, infinite palette | Hardware cost, less tactile |
According to Anthony Segal, MFA (botanical drawing instructor, Chicago Botanic Garden), “Most students develop richer observation skills with pencils first. You can slow down and really look, which is half the magic.”
Essential Supplies for Colored Pencil Florals
Top Picks for Colored Pencils
- Prismacolor Premier: Loved across the US for their creamy texture and blendability. A starter 24-pack runs about $28 in 2026.
- Faber-Castell Polychromos: Oil-based, sharper points–great for fine leaf veins and crisp edges. 24-pack: ~$42.
- Caran d’Ache Luminance: Premium, lightfast pigments. Pricey but stunning for professional work.
Paper Matters
Botanical drawings need paper that can handle repeated coloring and erasing, without giving up texture.
Recommended:
- Strathmore Bristol Smooth (300 Series): Good surface for detail work–$11 for a 9×12” pad (20 sheets).
- Fabriano Artistico Hot Pressed: If you want high-end, archival quality.
Other Must-Have Tools
- Kneaded eraser (for gentle, residue-free corrections)
- Pencil sharpener (handheld, not electric for more control)
- Blending stumps or tortillons
- White gel pen or Prismacolor “Colorless Blender” for fine highlights
“Go for a mid-toned gray or cream paper if you want your whites to pop. It gives florals a luminous quality,” says Julia Tran, botanical illustrator, Washington D.C.
Step-By-Step Colored Pencil Botanical Drawing Tutorial
Step 1: Choose and Observe Your Flower
It all begins with real flowers, not just Google Images. Pick a fresh bloom–Trader Joe’s, Whole Foods, or your backyard. Try a simple daisy or tulip to start. Place it under natural light and turn it slowly, noticing the shadows and color variations.
Step 2: Light Pencil Sketch
With a standard HB or 2H graphite pencil, lightly sketch the outline. Don’t press hard–you’ll want these lines to disappear or blend in later. Focus on the main contours: petals, stem, main leaves. Use the “ghosting” trick: hover your hand above the page to visualize before you draw.
Step 3: Select Your Palette
Lay out your colored pencils. Match at least three shades for each major color area: one for highlights, one midtone, one shadow. For a pink rose: try PC 929 (Pink), 930 (Magenta), and 925 (Crimson Lake). For leaves: PC 989 (Chartreuse), 911 (Olive Green), 908 (Dark Green).
Step 4: Block in the Lightest Colors
Begin with the lightest hues, laying them down with gentle pressure and small, circular strokes. This avoids harsh lines and preserves paper texture–a secret for making petals look velvety.
Step 5: Layer and Blend
Add midtones, slightly overlapping your light base. Build shadow with firmer pressure, using darker pencils sparingly. Use a blending pencil, tortillon, or tissue to smooth transitions (but don’t overblend; you want some texture!).
Step 6: Deepen the Shadows
With a sharp dark pencil, refine the deepest shadows–usually where petals overlap or tuck into the bloom. For ultra-dark spots, blend indigo (PC 901) into the darkest green or red. Shadows aren’t flat black–look for cool or warm undertones.
Step 7: Finishing Touches
Revisit the highlighted areas–often a swipe of white, pale yellow, or even a soft blue. Use a sharp eraser to lift out tiny highlights. Add the finest veins or pollen with the tip of a colored pencil or a white gel pen.
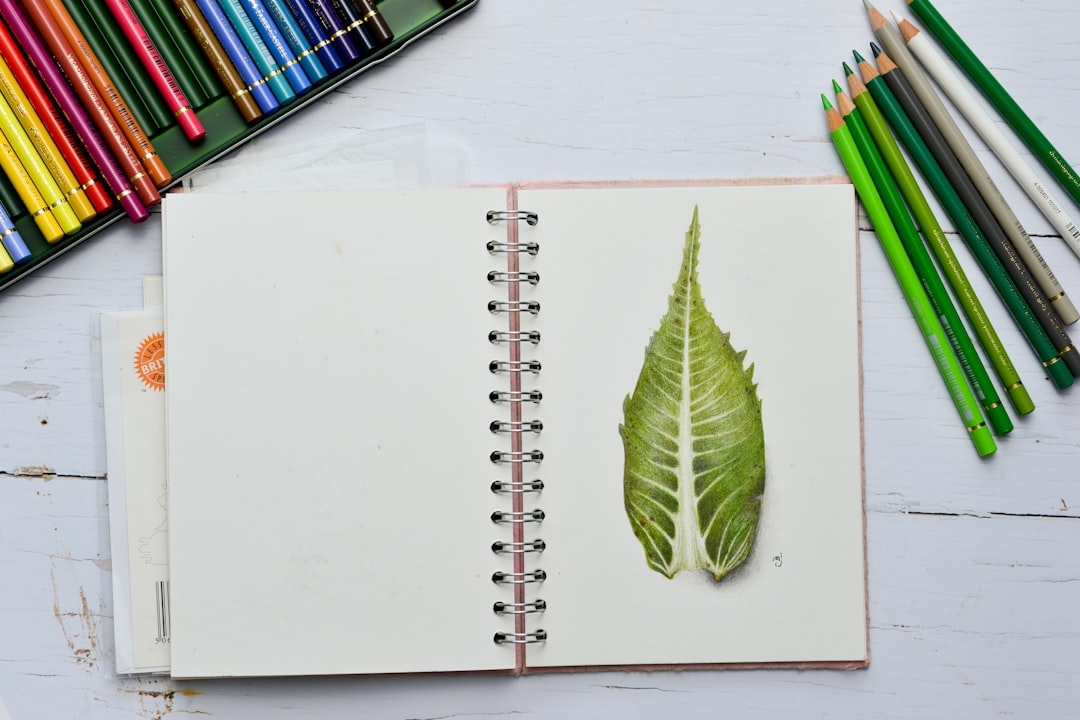
Checklist for a Realistic Botanical Drawing:
- Varied pressure: soft light, firmer in shadows
- Color layering for depth, not just single hues
- Details saved for last, after main shapes are done
- Use reference photos only for backup
Common Mistakes (and How To Fix Them)
Overblending
Too much blending using tissue or solvent can flatten your drawing. Leave a little “tooth” and texture–it helps petals look real, not plastic.
Outlines Too Dark
Go easy on initial graphite lines, or erase them gently before adding color. Outlines should disappear, not dominate.
Skipping Shadows
Without shadows, even the most vivid flower looks flat. Study where shadows actually fall on your specimen, not where you think they should be.
Dirty Colors
Mixing too many hues without cleaning your pencil tip, or using muddy browns, can dull the freshness of petals. Wipe pencils on a scrap paper often.
Real-World Examples: US Botanical Artists
Modern Botanical Illustration Stars
- Wendy Hollender: Her “Botanical Drawing in Color” workshops are booked out months ahead. She recommends at least 10% of your studio time just observing real flowers.
- Carol Woodin: Based in New York, her colored pencil orchids have hung at the Smithsonian. She says, “Botanical art is as much about patient curiosity as about talent.”
- American Society of Botanical Artists: Their annual show in NYC in 2026 featured over 60 colored pencil florals, with juror Megan Lee (PhD, plant sciences) noting the “incredible variation in petal iridescence captured by hand.”
Where to Find Inspiration and Classes in 2026
- Local botanical gardens: Places like Longwood Gardens (PA), Chicago Botanic Garden, and San Francisco Botanical Garden often offer in-person drawing workshops.
- Online courses: Try Skillshare, Domestika, or Udemy for colored pencil florals. Look for instructors with botanical illustration experience, not just generic drawing.
- American Society of Botanical Artists (ASBA): Membership includes online meetups, critiques, and annual exhibitions.
“You can tell a botanical artist by the way they squint at a peony for five minutes before touching pencil to paper,” quips Sarah Mendez, Portland-based drawing teacher.
Frequently Asked Questions
How do I make flower petals look soft and realistic with colored pencils?
Use light, overlapping strokes in small circles to build color gradually. Softly layer at least three shades per petal, blending gently with a blending pencil. Keep the paper’s texture visible for a true-to-life effect. Avoid hard edges except where petals naturally separate.
What are the best colored pencil brands for botanical art in the US?
The top choices in 2026 are Prismacolor Premier (best for rich blends), Faber-Castell Polychromos (sharp details), and Caran d’Ache Luminance (most lightfast for archival work). All are available at US art stores like Blick or Michaels and online via Amazon.
How do I choose paper for colored pencil flower drawings?
Go for heavyweight (at least 90lb), smooth, and acid-free paper. Strathmore Bristol Smooth and Fabriano Artistico Hot Pressed are favorites among US botanical artists, offering enough tooth to hold layers without wearing down pencils fast.
Can I fix mistakes in colored pencil botanical sketches?
Yes–use a kneaded eraser for lifting soft mistakes or a precision eraser for details. For color correction, a white pencil or colorless blender can mute misapplied areas. It’s harder to erase once several layers are down, so start light and build up gradually.
Where can I share or sell my colored pencil flower art in the US?
Try platforms like Etsy, Instagram, and local galleries. The ASBA (American Society of Botanical Artists) also invites submissions for annual shows. Some US florists and botanical gardens commission original art for events or merchandise–reach out with a small portfolio.
Ready to Try? Here’s Your Challenge
Pick a flower–any flower–on your next walk, market run, or doorstep delivery. Sit down with your colored pencils and a fresh sheet of Bristol. Spend five minutes only looking, then sketch what you see. No pressure for perfection, just practice. With patience and practice, you might find yourself seeing the world’s blooms–and your own artistic skill–in a brand new light.