Contents:
- How can you make your phone flower photos look professional?
- Know Your Phone’s Camera: Small Features, Big Difference
- Portrait Mode and Macro: Friend or Foe?
- Keep It Steady
- Lighting: The Secret Sauce for Showstopping Blooms
- Composition: How to Frame Instagram-Worthy Florals
- The Rule of Thirds
- Get Low, Go Close
- Backgrounds: Keep It Simple
- Focus and Exposure: Nail the Details
- Tap to Focus
- Manually Adjust Brightness
- Burst Mode
- Editing: Subtle Tweaks, Not Filters
- Best Editing Apps in 2026
- What to Edit
- Shoot Like a Pro–Even With $10 Grocery Flowers
- How to Up the Wow Factor on a Budget
- Table: Quick Comparison – Phone Camera Features for Flower Photography (Top 2026 Models)
- Common Mistakes (And How to Avoid Them)
- Bonus: Creative Ideas for Flower Phone Photography
- FAQ: Phone Flower Photography
- What is the best time of day to photograph flowers with a phone?
- How do I stop my phone from making colors look unnatural in flower photos?
- Which phone has the best macro camera for flowers in 2026?
- What’s the quickest way to improve my flower photos?
- Should I use Portrait Mode or not for flower shots?
Phone Flower Photography Tips That Look Pro
Snap a peony on your phone and you might think, That’s nice. But gaze at the same bloom shot with just a few expert tweaks? Suddenly, it’s a showstopper–a portrait ready for the cover of Better Homes & Gardens or the Instagram Explore page. More Americans than ever are capturing their bouquets and wildflower finds with smartphones, and with a record 189 million iPhone and Android devices in use across the US in 2026, your pocket camera packs more floral-photo power than you might think.
How can you make your phone flower photos look professional?
The fastest way to make flower photos from your phone look pro:
- Shoot in natural light (morning or late afternoon).
- Tap to focus on the most eye-catching petal or stamen.
- Adjust exposure manually to avoid blown-out highlights.
- Use Portrait Mode or a wide aperture for creamy background blur.
- Clean your lens before shooting.
- Use gentle photo editing for color and sharpness, not filters.
These five tricks–recommended by NYC florist and photographer Daisy Lin, AIFD–turn average flower snapshots into scroll-stopping images. For even bolder results, try shooting from unusual angles or with a simple white background.
Know Your Phone’s Camera: Small Features, Big Difference
High-end phones like the iPhone 16 Pro Max and Samsung Galaxy S25 Ultra are loaded with camera tech you might overlook. While every phone is different, understanding your device’s capabilities is the first step to pro-level flower photography.
Portrait Mode and Macro: Friend or Foe?
- Portrait Mode: Great for bouquets and single stems, but can make small details look “cut out” if background separation is too strong. Adjust strength if your phone allows it.
- Macro Setting: Ultra-close details–think dewdrops or pollen–pop best here. The latest iPhones focus as close as 2cm (about 0.8 inches), while many Androids have super-macro modes. Beware: shaky hands can blur shots.
- Pro/Manual Mode: Newer Samsung and Google Pixel models let you manually control ISO, white balance, and shutter speed. Lower ISO yields crisper flower textures.
“Shooting in Pro mode lets you control light and color, which makes a $1 grocery-store carnation look like a $10 showpiece.”
– Will Carter, Master Florist & Mobile Photo Instructor, Los Angeles
Keep It Steady
A mini tripod or pop-socket grip (under $30 on Amazon in 2026) can eliminate blur, especially in low light or with macro shots.
Lighting: The Secret Sauce for Showstopping Blooms
Professional florists obsess over light–and you should, too. The single biggest reason amateur flower photos look flat or dull? Harsh indoor bulbs or, worse, direct sunlight at midday.
- Best Times: Early morning (7-9am) or golden hour (about 1 hour before sunset). The low sun makes petals glow.
- Cloudy Days: Nature’s softbox! Clouds diffuse light, making colors softer and shadows less harsh.
- Avoid These: Flash (makes colors look unnatural), direct midday sun, mixed indoor lighting.
| Light Type | Pro & Con | Best Use |
|---|---|---|
| Golden Hour | Warm, glowing, soft shadows | Rose bouquets, macro |
| Cloudy Day | Even, true colors, low contrast | Wildflowers, pastels |
| Direct Sun | High contrast, harsh shadows, blown-out | Bold, saturated blooms |
| Desk Lamp | Yellow cast, shadows | Last-resort/tabletop |
Tip: To control a mix of indoor lighting, try shooting near a north-facing window with curtains drawn for the softest look.
Composition: How to Frame Instagram-Worthy Florals
Ever noticed how professional florists and garden bloggers frame their flowers? It’s not random–simple composition tricks can transform your shots.
The Rule of Thirds
Turn on the grid in your camera settings. Place the flower–or the most interesting part–at one of the four grid intersections, not dead center. It’s a classic for a reason.
Get Low, Go Close
Flowers aren’t built for eye-level shots. Get on petal-level or shoot up from below for dramatic angles. For big bouquets or arrangements, try a flatlay: shoot directly overhead with even light.
Backgrounds: Keep It Simple
A busy background distracts. Use:
- White poster board ($2 at Target)
- Neutral tablecloth
- The sidewalk or simple foliage
Pro tip: Place a couple petals or fallen leaves around the main subject to give context.
Focus and Exposure: Nail the Details
Floral photos shine when the tiniest textures are sharp and bright–think rose petals, anemone stamens, or fuzzy eucalyptus.
Tap to Focus
On both iPhone and Android, tap the area you want sharpest (usually the center of the flower). The camera will adjust both focus and exposure to highlight that spot.
Manually Adjust Brightness
After tapping to focus, drag your finger up or down (on iPhone, use the sun icon slider; on Samsung, slide the exposure line). Go slightly darker to avoid “blown out” petals.
Burst Mode
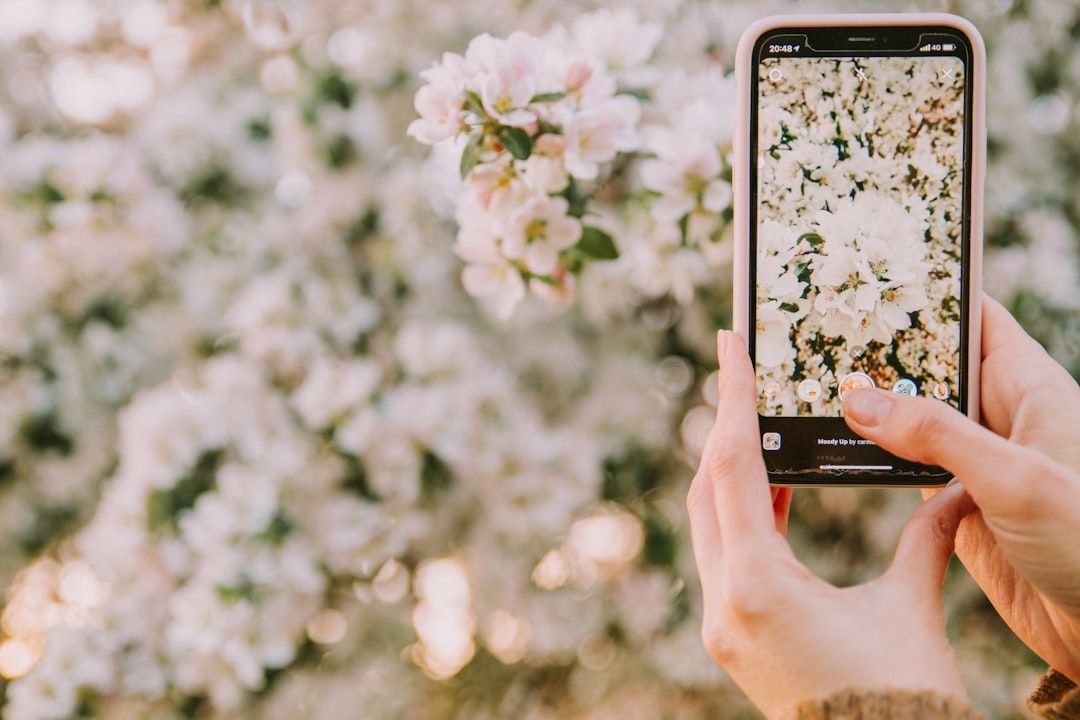
Shooting a bouquet in the breeze? Hold down the shutter for burst mode. Pick the sharpest image later. This is crucial for outdoor markets or backyard gardens where wind is inevitable.
“The fine details–like pollen or veins in petals–make a phone shot look pro. Always double-tap to zoom in and check sharpness before moving on.”
– Elena Park, Urban Botanist, Chicago
Editing: Subtle Tweaks, Not Filters
The magic often happens after the shoot. But heavy filters can trash true colors and make even peonies look plastic.
Best Editing Apps in 2026
- Snapseed (free): Superb pro-level tools, especially the “Selective” brush for brightening.
- VSCO ($1.99/month): Great for subtle color grading.
- Adobe Lightroom Mobile (free, or $4.99/month for premium): Granular control over color, sharpness, and white balance.
What to Edit
- Exposure: Lighten or darken overall image.
- Contrast: A bump helps textures pop.
- Color Temperature: Adjust to match real-life hue–too cool makes flowers look sad.
- Sharpen: Use sparingly to crispen petals.
- Spot Heal: Remove specks, dirt, or wilted petals.
Pro editing tip: Start subtle. If a photo screams “edited,” you’ve gone too far.
Shoot Like a Pro–Even With $10 Grocery Flowers
Not all great floral photos require rare tulips or high-end bouquets. In fact, some of the most-liked Instagram flower shots are of simple supermarket blooms.
How to Up the Wow Factor on a Budget
- Mix flower types (daisies, carnations, mini-roses cost under $2/stem at Trader Joe’s in 2026).
- Snip and rearrange stems to fit a quirky vase (mason jars, vintage mugs).
- Place flowers near soft window light and use a clean background.
- Photograph from above for volume, or from the side to focus on one striking bloom.
Fast Fix: Remove price tags and lower leaves–messy stems are distracting, even in a pro-level photo.
Table: Quick Comparison – Phone Camera Features for Flower Photography (Top 2026 Models)
| Feature | iPhone 16 Pro Max | Samsung S25 Ultra | Google Pixel 10 Pro |
|---|---|---|---|
| Max Resolution | 48MP | 200MP | 50MP |
| Macro Focus Distance | 2cm (0.8 in) | 3cm (1.2 in) | 2cm (0.8 in) |
| Manual Pro Mode | No (limited) | Yes | Yes |
| Portrait Mode Control | Yes (adjustable) | Yes (more granular) | Limited |
| Built-in Editing | Good | Excellent | Excellent |
Common Mistakes (And How to Avoid Them)
- Fingerprints on Lens: A swipe with a microfiber cloth boosts sharpness instantly.
- Overexposure: Check highlights–missing petal texture means too bright.
- Busy Backgrounds: Always check behind your subject.
- Autofocus Hunting: Lock focus by tapping and holding; move slightly for extra sharpness.
Bonus: Creative Ideas for Flower Phone Photography
- Reflections: Place flowers near a mirror or on a glass table for artsy effects.
- Water Drops: Mist petals for instant freshness (a florist’s trick for photoshoots).
- Petal Close-Ups: Zoom in on a single petal, vein, or stamen for abstract beauty.
- Handheld Portraits: Ask someone to hold the bouquet for a lifestyle aesthetic.
FAQ: Phone Flower Photography
What is the best time of day to photograph flowers with a phone?
Morning (7-9am) and late afternoon (around golden hour) are ideal for gentle, flattering light that brings out true colors and delicate petal details. Avoid harsh midday sun.
How do I stop my phone from making colors look unnatural in flower photos?
Shoot in natural daylight and avoid using the built-in flash. In editing apps, tweak the color temperature slider to match the flower’s real-life hue.
Which phone has the best macro camera for flowers in 2026?
As of 2026, the Samsung Galaxy S25 Ultra leads for ultra-close macro shots (200MP sensor, crisp detail up to 3cm away), but iPhone 16 Pro Max and Google Pixel 10 Pro are also excellent for most users.
What’s the quickest way to improve my flower photos?
Clean your lens, use natural window light, and tap to focus on the flower’s center. Edit for exposure and sharpness, not heavy filters.
Should I use Portrait Mode or not for flower shots?
Portrait Mode can create a pleasant blurred background and make your flower stand out, but use it carefully–sometimes details get lost or the edges look fake. Try both and compare.
Ready to turn your next farmer’s market bouquet or backyard bloom into a standout photo? Try one or two of these techniques on your next walk or delivery–then share the results with a florist friend or tag your local flower shop. You might just start seeing the floral world with new eyes–and your followers will, too.